This is the fastest easiest pizza dough I have found! And it's good! People keep requesting my pizza so here you go:
1/2 to 3/4 cup warm water (105-115 degrees F)
1 T dry yeast (one pack)
1 t sugar
1 C white flour
1 C wheat flour
1 T oil
1/2 t salt
Combine 1/4 C water with yeast and sugar. Stir to disolve the yeast, and let stand til bubbly, about 5 min.
Put the flour, oil and salt in food processor, and process with the steel blade for about 5 seconds.
And the yeast mixture to the flour mixture and process about 10 seconds or until well blended.
Turn on the processor and drizzle just enough of the remaining water through the feed tube so the dough forms a ball that cleans the sides of the bowl. Process so that it turns around about 25 times.
Put the dough ball onto a large seasoned stone and cover with a glass bowl for 10 mins. (It will sweat.) Pat the dough out and roll it, leaving a little edge for your crust.
Spread with sauce and toppings and bake for 15-20 mins at 425 degrees; until crust is golden and cheese is bubbly!
Dig in!
Compliments of The Tightwad Gazette II, my new best friend.
Showing posts with label Pampered Chef. Show all posts
Showing posts with label Pampered Chef. Show all posts
Saturday, January 10, 2009


Saturday, December 13, 2008
Candy Cane Brownie Lollipops
What's Cookin' in my kitchen today???
 Candy Cane Brownie Lollipops
Ingredients
1 pkg (18-21 oz) fudge brownie mix (plus ingredients to make brownies)
24 candy canes
10 oz chocolate-flavored almond bark
Additional decorations such as red jimmies (optional)
1. Line Medium Sheet Pan (or 9-in. by 13-in. metal pan) with a 13-in. piece of Parchment Paper; lightly spray with nonstick cooking spray and set aside. Prepare brownie mix according to package directions; pour batter into pan. Bake 30 minutes or until wooden pick inserted in center comes out with moist crumbs attached. Remove from oven to Stackable Cooling Rack; cool 20 minutes or until still slightly warm.
2. Meanwhile, cut straight ends of candy canes off to form 4½-in. sticks using Utility Knife. Place candy cane tops into resealable plastic bag and crush using flat side of Meat Tenderizer; set aside.
3. Using Medium Scoop, scoop brownie into 24 rounded scoops, packing brownie into scoop using hands. (Entire brownie will be used.) Roll brownie scoops into smooth balls. Insert candy cane sticks into centers of balls, mounding brownie around each stick to secure. Pinch each brownie ball where candy cane and top of ball meet.
4. Place almond bark into Small Batter Bowl; microwave according to package directions until smooth. Spoon melted bark evenly over each brownie ball, turning to coat completely. Be sure to coat where candy cane stick meets brownie ball. Allow excess bark to drip off. Dip into reserved crushed candy canes or jimmies and stand upright on a piece of Parchment Paper. Repeat with remaining almond bark, lollipops and crushed candy. Let stand until set. Place into miniature cupcake liners.
Yield: 24 servings
Cook’s Tips: Although the edges of the brownies are crusty, they don’t need to be discarded. Simply scoop the edges along with the center, and they’ll soften as they stand. If desired, lollipop sticks or stick candies can be substituted for the candy canes. Wrap lollipops in cellophane, tie with ribbon and use as table décor, place cards or take-home goodies for a special
Christmas touch.
From The Pampered Chef® Festive Holiday Desserts Recipe Collection.
If you'd like more information on The Pampered Chef, e-mail me!
 Candy Cane Brownie Lollipops
Ingredients
1 pkg (18-21 oz) fudge brownie mix (plus ingredients to make brownies)
24 candy canes
10 oz chocolate-flavored almond bark
Additional decorations such as red jimmies (optional)
1. Line Medium Sheet Pan (or 9-in. by 13-in. metal pan) with a 13-in. piece of Parchment Paper; lightly spray with nonstick cooking spray and set aside. Prepare brownie mix according to package directions; pour batter into pan. Bake 30 minutes or until wooden pick inserted in center comes out with moist crumbs attached. Remove from oven to Stackable Cooling Rack; cool 20 minutes or until still slightly warm.
2. Meanwhile, cut straight ends of candy canes off to form 4½-in. sticks using Utility Knife. Place candy cane tops into resealable plastic bag and crush using flat side of Meat Tenderizer; set aside.
3. Using Medium Scoop, scoop brownie into 24 rounded scoops, packing brownie into scoop using hands. (Entire brownie will be used.) Roll brownie scoops into smooth balls. Insert candy cane sticks into centers of balls, mounding brownie around each stick to secure. Pinch each brownie ball where candy cane and top of ball meet.
4. Place almond bark into Small Batter Bowl; microwave according to package directions until smooth. Spoon melted bark evenly over each brownie ball, turning to coat completely. Be sure to coat where candy cane stick meets brownie ball. Allow excess bark to drip off. Dip into reserved crushed candy canes or jimmies and stand upright on a piece of Parchment Paper. Repeat with remaining almond bark, lollipops and crushed candy. Let stand until set. Place into miniature cupcake liners.
Yield: 24 servings
Cook’s Tips: Although the edges of the brownies are crusty, they don’t need to be discarded. Simply scoop the edges along with the center, and they’ll soften as they stand. If desired, lollipop sticks or stick candies can be substituted for the candy canes. Wrap lollipops in cellophane, tie with ribbon and use as table décor, place cards or take-home goodies for a special
Christmas touch.
From The Pampered Chef® Festive Holiday Desserts Recipe Collection.
If you'd like more information on The Pampered Chef, e-mail me!
Thursday, December 04, 2008
Nativity Plate and Christmas Cheer
 This Nativity Plate came to me after my Grandma Gladys died. I remember when my Mom got it for her and grew up seeing one (my Mom's) in our home. It was a memorable Christmas when I put this up in my home for the first time. Now, it has a special place on my buffet and for sure a special place in my heart.
 I used what I call the "rose petal technique" which brings the plate lighter and blurs the background a bit. Can you tell?
Do you have ornaments that each year when you see them you just have to laugh? Here's one of mine. I remember making it at church one year in Sunday School. I want to say I was 8, in 2nd grade but am just guessing.
Dated feathered bangs. Darling little blue jumper with red collared shirt. My mother obviously dressed me that day 'cause I would have been in jeans and a t-shirt. Hmmmm, somethings haven't changed much, have they?!

Today, I am baking sugar cookies for my Lia Sophia party. I'm also making a delicious brie recipe that I could eat the whole thing of, but won't. Unless no one shows then I might. That would NOT be a good thing - me eating the whole thing. I think it weighs 5 pounds by itself!
Did you know I have a Pampered Chef website now? You can order directly from it, pay online and it will ship directly to you! How cool is that??? Just e-mail me for the addy. There's also a great clearance section with discounted retired products you can only access from the web!
I'm listening to Kenny G and Javier play. This is what I want more of my days to be like - baking, playing and having friends over!
Oh, I could NOT for the life of me figure out how to post a video from youtube here. I have an account, did everything April told me to and splat - nada. I did get a blurb on the sideline for you to see. PLEASE, either watch the video at April's or see it in my sidebar.
Now, I'm off to finish my cookies and spruce the house a bit. Hip Hip Hooray - Christmas Cheer is here!!!
Thursday, September 25, 2008
Strawberry Lavender Jam
I tried my hand at Strawberry Lavender Jam this year. I had 4 lbs of strawberries and too many to count lavender plants outside so I set out in search of the perfect recipe and by George, I FOUND IT!
Here you see the strawberries and lavender boiling. That's an important step in jam making:
 See the Lavender? The smell was out of this world delicious!!!
 I also found a new use for my Pampered Chef mix-n-chop - it works perfectly for mashing fruit in jam making. I used it for my peach recipes, too.
 8 nicely sealed jars of the nectar:
 And here's where I remembered to take a picture of it on my toast. I probably shouldn't tell you this was my second piece....
 The one different thing to this recipe than anything else I've made is the overnight step of letting the lavender, strawberries and sugar mix flavors. I think that proved to make the lavender really come through in a nice, not overpowering but "I'm here!" way.
Here you see the strawberries and lavender boiling. That's an important step in jam making:
 See the Lavender? The smell was out of this world delicious!!!
 I also found a new use for my Pampered Chef mix-n-chop - it works perfectly for mashing fruit in jam making. I used it for my peach recipes, too.
  8 nicely sealed jars of the nectar:
 And here's where I remembered to take a picture of it on my toast. I probably shouldn't tell you this was my second piece....
 The one different thing to this recipe than anything else I've made is the overnight step of letting the lavender, strawberries and sugar mix flavors. I think that proved to make the lavender really come through in a nice, not overpowering but "I'm here!" way.
Tuesday, August 12, 2008
Canning Green Beans
A month ago there was a post about canning and I instantly thought, "Oh yeah. Now we're talking! This I CAN do!" And then my friend Heather mentioned my canning craziness and finally, I was reminded last night why I got all excited when I read both of their posts. I love canning.
First off, clean your kitchen. It's so much nicer to prepare food in a clean space.
 Make sure there is plenty of water so you can swoosh them around and get the dirt off 'em:
 Now swoosh 'em and move 'em and push 'em and... you get the idea. Clean 'em.
 In smaller batches, I put a couple handfulls in my awesome strainer and work from that:
 Boil lids.
First off, clean your kitchen. It's so much nicer to prepare food in a clean space.
 Wash the beans. I weighed myself then the beans and came to the conclusion that I had 10 pounds of green beans. The easiest way I have found to wash them is to dump them into a clean sink and fill it with water.
 Make sure there is plenty of water so you can swoosh them around and get the dirt off 'em:
 Now swoosh 'em and move 'em and push 'em and... you get the idea. Clean 'em.
 In smaller batches, I put a couple handfulls in my awesome strainer and work from that:
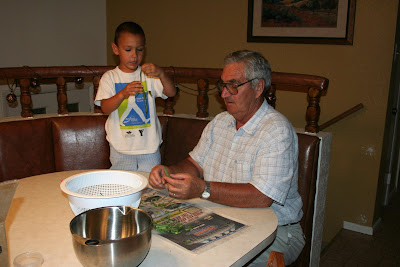
 Now get to snippin'! The fastest and easiest way is to use your hands to snip off each end and then snip them in twos or thirds: Putting newspaper under your work area will catch all the loose ends and make clean up a breeze.
Place the snipped beans in a clean container, like my stainless steel mixing bowl:  Get all abled (and not) bodies to help snip. Here you can see what happens when my Dad arrives unexpectedly during this process:
 Boil lids.
 Invite company over and don't tell them what you're going to do. Then put them to work. Here is one guest filling CLEAN jars with snipped beans. Pack them tightly, lady!
 Leave 1' headspace. That's the space between the beans and the top of the jar.
 Fill the jars with hot water. Please be careful and don't burn yourself. Remember, it's HOT water!
 After you add the jars to the pressure cooker...following your cookers instructions carefully, get the cooker boiling and steam coming out of the release valve for a full 10 minutes. Once you have done that, you put the weight on, or however your cooker works, and bring it to a full 10 pounds of pressure:
 Keep it at 10 pounds, adjusting the burner temperature as needed, for 25 minutes. Then, turn off the burner and let the pressure drop to 0. Or, be like me and turn off the burner and go to bed. It'll be fine come morning and you won't be worried about opening the lid. I do take off the weight once it's at 0 to release the pressure. (See your book for official instructions.)
 Gorgeous home canned grean beans. I am happy to say they all sealed!
Sunday, May 11, 2008
Feliz dia de las madres
 My Mom, Nana, and Javier Don
Roses are Red, Violet's are Blue
There are lots of Nana's in the world
But none as good as you!!!
What a wonderful Sunday. I awoke to the table being set, coffee brewed and pancakes grillin'.... all while I lay in slumber in my bed! Could it get much better than that? Oh yeah.... breakfast with my children and nephew and a nice treat of having Ann, my mother-in-law dine with us! While I was still in my robe, we ate, visited and had a nice morning.
Off to church we went where we mother's were honored more! With poems, hand made presents from Paco and words of affirmation, could it get any better? Yes, I had all but one of my kiddos with me for the first time - ever. Little Sky was the only one missing from me but not from my heart.
And it gets better - lunch out at Tacos Michoacan's where we dined on tacos, rice and beans! Home - James Home for a nap and boy was that nice!
Finished the spicy noodle salad for our family dinner and made my 12 minute Pampered Chef fluted stone cake in the microwave and we were off for more good food and family!
It was a great day. I got love, love and more love. What more could a mom ask for? Nuttin'. But I got more. A brand new microwave to go over my stove since our old one quit and I've been without for a week. And all the belly achin' paid off I guess because I was FLOORED! And felt like a heel for my temper tantrum earlier when I needed a microwave to melt butter and make my dessert.... I was pouty and ungrateful. Truly a recipe for disaster. Ugh.

Oh, yeah, I'm a heel, but I don't know it yet!
And now? What more could I ask for? Nuttin'! But here I sit, bloggin' while Roy deals with the kids, cleaning up and who knows what else. "Mommy time," he said. And I ran. Before he changed his mind! And as soon as I am done here, I am heading to my bedroom to sip my tea, eat bon-bons and watch "nothing" on t.v. Well, maybe not the bon-bons but they sound good.
To all you mom's - HAPPY MOTHER'S DAY!

Mandy and Karris' 1st Mother's Day
(None of the above photos were edited in any way, shape or form. Otherwise, I'd have fixed my red face!)
Coming Soon.... 1st Ever CONTEST! Yee Haw!
Thursday, April 17, 2008
Hot Burrito!
I made "breakfast" burritos for my boys to eat at their track meet. I ask DH, el mexicano, why they are called "breakfast burritos" if it's night time.
"Sausage."
Sausage?
"Si, sausage. They are breakfast burritos no matter when you eat them."
Always? What if I just want a burrito with sausage? Do I have to call it a breakfast burrito?
"Mama mia! It's a breakfast burrito, already."
So, I needed to know how to keep 'em hot so they tasted good by 5:00 that night in a different city - well the only real city around but our county is getting better.
How do I keep 'em hot?
"Well, my love.... you wrap them in foil and lay them across the dash with your defrost on high and that, my dear, will keep the burritos hot all the way there."
ON MY DASH?!?!?! As in all six of 'em lined up?
"Si."
This my friends, is what I did. All the way there. Thankfully, it was cold and the full blowin' heat wasn't too stiffling.
"Sausage."
Sausage?
"Si, sausage. They are breakfast burritos no matter when you eat them."
Always? What if I just want a burrito with sausage? Do I have to call it a breakfast burrito?
"Mama mia! It's a breakfast burrito, already."
So, I needed to know how to keep 'em hot so they tasted good by 5:00 that night in a different city - well the only real city around but our county is getting better.
How do I keep 'em hot?
"Well, my love.... you wrap them in foil and lay them across the dash with your defrost on high and that, my dear, will keep the burritos hot all the way there."
ON MY DASH?!?!?! As in all six of 'em lined up?
"Si."
This my friends, is what I did. All the way there. Thankfully, it was cold and the full blowin' heat wasn't too stiffling.
 So, I send DH this picture. He immediatley calls me:
"What happened? Are you okay?"
What do you mean? Did you get the picture I sent?
"Si, that's why I'm calling! What happened to the van?"
What van?
"The van you took a picture of." (Frustration in his voice...)
Oh, that. Well, you see my dear, it was a picture of the burritos. I did just as you told me!
"Wull, yeaaahh, so they stay hot."
~~~~~~~~~~~~~~~~~~~~~~~~~~
So, I was thinking the whole way there, why Pampered Chef doesn't have something to keep to-go food hot during transport, when it hit me. They do. And I own it.
But then, I wouldn't have this to share with you and that my friend, would be a shame.
UPDATED: DH is Darlin' Hubby when he's a good boy and Doofus Hubby when not. I try not to say Dumb Hubby but I probably think it sometimes. Sorry dear, just being honest. :(
Wednesday, April 09, 2008
Meal Time
We had company over for supper on Saturday night and I've been wanting to try out this new lasagna recipe I found over at The Pioneer Woman's site. I made The Best Lasagna! It was delicious and not the hard, time consuming meal I remember my mom complain about. Also, I've always thought of it as an expensive meal to prepare and was happy to find a recipe that fit our budget!
Let me know if you try it! I made it in my Pampered Chef rectangular baker and it stayed hot the entire time - well, til it was finished off completley!!!
That and my chocolate sheet cake is getting asked for more and more often!!! It truly melts in your mouth. For those of you who really know me, I don't add the nuts. And it's still the best ever. Really. Just ask anyone around me. They LOVE it! Poor Paco was begging for it last week. I caved and made it Sunday morning before church. It was perfect. He was happy. He wanted it for breakfast. That's when you know it's good - when a 3 year old wants it for the meal and not dessert.
Let me know if you try it! I made it in my Pampered Chef rectangular baker and it stayed hot the entire time - well, til it was finished off completley!!!
That and my chocolate sheet cake is getting asked for more and more often!!! It truly melts in your mouth. For those of you who really know me, I don't add the nuts. And it's still the best ever. Really. Just ask anyone around me. They LOVE it! Poor Paco was begging for it last week. I caved and made it Sunday morning before church. It was perfect. He was happy. He wanted it for breakfast. That's when you know it's good - when a 3 year old wants it for the meal and not dessert.
Monday, March 31, 2008
It Really Is...
THE BEST CHOCOLATE SHEET CAKE. EVER!!!
 Sweet Melynda & Ashley share what appears to be one of the last pieces.
It's so good my daughter wouldn't even remove the fork from her mouth in fear that she would miss out on some the chocolate crumbs.
 About 30 minutes (at the most) after I brought the cake down stairs.
I have a Texas Sheet Cake that I have used and got it from a good girlfriend's mother-in-law. It's yummy and it has been used for many an occasion. So, when I saw this claim by Ree, THE Pioneer Woman, I was skeptical - to say the least. But, I had to make it. The differences in our recipees were minute. Hers has more butter and vanilla. And, it's better. See for yourself. You can see step by glorious step by clicking on the above link. It's worth it. Here's my final product (above.) I used my Pampered Chef large bar pan and didn't oil the pan first.
 You can see step by glorious step by clicking on the above link. It's worth it. Here's my final product (above.) I used my Pampered Chef large bar pan and didn't oil the pan first. Sweet Melynda & Ashley share what appears to be one of the last pieces.
It's so good my daughter wouldn't even remove the fork from her mouth in fear that she would miss out on some the chocolate crumbs.
 About 30 minutes (at the most) after I brought the cake down stairs.
 I am smart, though, and gave myself and nice big serving the first time around 'cause I had a feeling that it might be my only one! It was.
Tuesday, February 19, 2008
Day 18
We had a most delightful dinner last night. My parents came over, along with my nephew Brady. So, there were 10 of us around our kitchen table - more cozy that way, right?
I made mole de pollo (Chicken Mole) with my mother-in-law's mexican rice and refried beans and then mandatory flour tortillas for this dish. Much to Paco's delight since tortillas de hareina are his favorite over maiz. (he likes flour tortillas more than corn tortillas.)
I cooked the chicken first my Pampered Chef way in the microwave while I got the mole perfect and the rice was cooking. Then I started cooking the tortillas on the comal, a flat round cast iron that sits directly on the burner and cooks tortillas. We have two.
After the chicken was done, Roy got it off the bone for me and put it on the pot with the mole cooking. We simmered that while the rice was finishing and I finished cooking 30 tortillas.
It all turned out delicioso as Paco says delicious and I got rave reviews. My parents think we're still doing very well on The Island.
I made mole de pollo (Chicken Mole) with my mother-in-law's mexican rice and refried beans and then mandatory flour tortillas for this dish. Much to Paco's delight since tortillas de hareina are his favorite over maiz. (he likes flour tortillas more than corn tortillas.)
I cooked the chicken first my Pampered Chef way in the microwave while I got the mole perfect and the rice was cooking. Then I started cooking the tortillas on the comal, a flat round cast iron that sits directly on the burner and cooks tortillas. We have two.
After the chicken was done, Roy got it off the bone for me and put it on the pot with the mole cooking. We simmered that while the rice was finishing and I finished cooking 30 tortillas.
It all turned out delicioso as Paco says delicious and I got rave reviews. My parents think we're still doing very well on The Island.
Friday, February 15, 2008
Heart Cake
Paco's Steps to a Heart Shake Cake for his Daddy:
Add the "ingreedents" Mommy tells him too.
Add the "ingreedents" Mommy tells him too.
 Mommy puts it in the pans, the oven, the cooling rack
Then we make frosting with lots of white cheese (cream cheese), butter and POWDERED SUGAR!!! Next we add a bunch of red food coloring to make it as dark pink as we can.
 Paco adds all the sprinkles his Mommy will let him and then throws in a few more shakes just to be sure there's enough. We ended up with red & pink sugar crystals and then lots of red, pink and red lips confetti sprinkles!!!
 Placed on Mommy's huge white Pampered Chef plate was perfect!
 Happy Valentine's Day, Daddy!!!
Monday, February 11, 2008
Making Yogurt
As you know, we aren't buying groceries this month so..... I'ma makin' yogurt! And, boy is it ever easy!!! I shall never have to pay $$$$ for yogurt again - not to mention organic!
Here's what you do to have some fresh yogurt in your fridge.
Have 4 cups milk - bring to room temp. As you can see here, I am using whole organic milk since this batch is for sweet Javier. Notice his name in TWO places so his siblings and father don't drink the little lads milk!
 A few tablespoons (I like 4 tb., also 1/4 c) of either yogurt from your prior batch (see below)or store bought. It must have life cultures to work! This is your "start."
 Add the room temp milk to a saucepan and heat to 180 degrees. Stir often. Not too hot of heat or it will scald! Trust me here. (I just use my Pampered Chef meat thermometer.)
 Important stirring part. Once you reach 180 degrees, turn off heat and set aside. Let the milk cool to 115. All the while the yogurt needs to be at room temp. Once the milk is at 115, take 1/2 cup of the milk and add the yogurt "start" to the 1/2 c milk. Stir and then add that combo to the whole pan of hot milk. This is done quickly so the milk is stil 115.
 While the milk was heating to 180, you got out your trust Stanley thermos and filled it with boiling water, right? Good. Now, empty the thermos of the water and fill with the milk mixture. Close it up tightly and set the thermos on your top oven rack as close to the oven light as you can. Leave the oven light on, close the oven door and "forget" about it for 4 -6 hours.
 The internal temp will remain 110-115 degrees. At the end of your forget about it time, pour the YOGURT into a bowl.
  Cover with a lid and refrigerate overnight. It will be set and cold and ready for breakfast! I like using the small batter bowl since I can always find its lid. That's not said for other containers I have. Also, I like using glass as I read it is more sterile than plastic?!?!
 If the plain flavor is too tart for you or those eating it, come serving time, add applesauce, jam, vanilla flavor or I guess just plain sugar though cough cough I would NEVER do that. Applesauce, yes and usually do for Paco. ;)
Enjoy! It's so easy and tasty I don't think I'll buy it again!!!
Sunday, February 10, 2008
Sunday Dinner (Week 2/Day 3)
Here is our meal EVERY Sunday after church since I can remember. Only today, I made it and not my mother. Let me preface this by saying that my Mom is by far THE BEST cook I know. Everything she makes turns out and if it doesn't, you can bet we don't hear about it.
So, step one is putting a defrosted roast in my Pampered Chef stone. By using my stoneware, I elimiate the the browning step that I grew up with. (Yes, my Mom does this now, too.) Then I season it with rosemary from my herb garden that I dried and some other secret spices from my cupboard...you know, like pepper.
 #2 - Next you peel potatoes and cut them in half and then half again...
 Like so. #3 -Then place them in the stone as you see pictured here.
 I arrange the potatoes around the edges and #4 - put the carrots in center, completely covering the roast.
 #5 is adding garlic over it all - 4 or 5 cloves is what I like.
 #6 - Adding water to my second knuckle. This is a very important rule. My Mom says!
 #7-Put the "top" on to create a dutch oven effect.
 This is also my 9x13 baker when not used as the top.
 Cook at 250 degrees for 3-4 hours. In our case it's when we get home from church. Yes, I go off and leave the oven on. I trust God to protect my home from fire when I'm at church but I probably shouldn't since my Grandma's ranch home burned to the ground while she ran food down to the workers at her church some 25 years ago. Anyway, I do. (So does my Mom.)
#8 - cooked and deliciously moist roast!
 And of course, sitting down with my family for our 1st year anniversary of moving in to our very own home.
Wednesday, November 28, 2007
Yeah for me!
I submitted my second Pampered Chef show today which means I get free spring products! And since the two shows are more than $1500, I get even MORE free spring products!!! Yippee!!! Just another reason why I love doing this.
So, I had two shows, made lots of money, plus free products and my hostesses are happy!!!
So, I had two shows, made lots of money, plus free products and my hostesses are happy!!!
Friday, November 16, 2007
T.G.I.F.
Why am I excited today is Friday? 'Cause I pumped enough milk for Roy & I to go see "American Gangster" tonight at Edwards!!! It's part of his birthday present.
After a good night's sleep I feel great and know I will feel even better after I get a shower!!!
I have "the best" barbecue chicken recipe. I buy thighs and legs at Costco (about $13 total of meat) and make my sauce from scratch. I have several variations to it but we seem to prefer the Mexican variation, imagine that. ;)
Anyway, I made it for the banquet last night, none of us got near enough of it so I'm making it again this weekend! Yummy!!! It's messy and the meat just falls off the bone baking it in my stoneware.
Speaking of stoneware - or any Pampered Chef products... we're doing a fundraiser for Caldwell Soroptimist. If there is anything you want for Christmas presents or for yourself, PLEASE call or e-mail me!!! They get 15% of our sales so it's an amazing fundraiser. Let me know if you have any fundraising needs, I can help you out, too!!!
Okay, off to that shower before Javier wakes.
After a good night's sleep I feel great and know I will feel even better after I get a shower!!!
I have "the best" barbecue chicken recipe. I buy thighs and legs at Costco (about $13 total of meat) and make my sauce from scratch. I have several variations to it but we seem to prefer the Mexican variation, imagine that. ;)
Anyway, I made it for the banquet last night, none of us got near enough of it so I'm making it again this weekend! Yummy!!! It's messy and the meat just falls off the bone baking it in my stoneware.
Speaking of stoneware - or any Pampered Chef products... we're doing a fundraiser for Caldwell Soroptimist. If there is anything you want for Christmas presents or for yourself, PLEASE call or e-mail me!!! They get 15% of our sales so it's an amazing fundraiser. Let me know if you have any fundraising needs, I can help you out, too!!!
Okay, off to that shower before Javier wakes.
Tuesday, November 06, 2007
Brie Recipe
The Pampered Chef ®
Tangy Pepper-Pecan BrieRecipe
1/2 cup pecan halves
1 jalapeño
pepper, stemmed and seeded
1/4 cup apricot preserves
1 4-inch round (8 ounces) Brie cheese with rind, room temperature
1 loaf (16 ounces) French
baguette
Vegetable oil
Preheat oven to 425°F. Coarsely chop pecans using Chef's Knife or food chopper. Chop jalapeño using Food Chopper. In Small Batter Bowl, combine jalapeño and preserves; mix well using Skinny Scraper. Cut Brie in half horizontally using Utility Knife. Place one half of Brie, cut side up, onto center of Large Round Stone. Spread half of the apricot mixture evenly over bottom half of Brie using Small Spreader. Top with half of the pecans and remaining half of Brie, cut side up. Spread remaining apricot mixture over Brie; sprinkle with remaining pecans.
Using Bread Knife, cut baguette on a bias into twenty-four 1/4-inch-thick slices. Arrange baguette slices around Brie; spray with oil using Kitchen Spritzer. Bake 8-10 minutes or until baguette slices are golden brown and Brie begins to soften. Remove from oven; let stand 5 minutes before serving. Serve using Bamboo Spreader.
Yield: 12 servings
Variations:
Sun-Dried Tomato Pesto Brie: Substitute 2/3 cup sun-dried tomatoes in oil,
drained, patted dry and chopped for the apricot preserves. Substitute 1
tablespoon prepared basil pesto for the jalapeño pepper and 1/4 cup pine nuts
for the pecans. Proceed as recipe directs.
Brown Sugar Dijon Brie: Substitute 1/2 cup brown sugar for the apricot
preserves, 1 tablespoon Dijon mustard for the jalapeño pepper and 1/2 cup sliced
almonds for the pecans. Reserve 1/4 cup of the almonds. Chop remaining almonds;
combine brown sugar, chopped almonds and mustard. Assemble as directed in Step
2; top with reserved almonds. Proceed as recipe directs.
Cook's Tip: Wear plastic gloves when working with jalapeño peppers. The
juice from the peppers can create a burning sensation on the skin. For a simple
garnish, slice a jalapeño pepper in half lengthwise using Petite Paring Knife.
Brush cut surface with apricot jam. Place next to Brie before baking. This
recipe can also be prepared on the Large Bar Pan, if desired.
Camembert cheese can be substituted for the Brie, if desired.Why is this a new favorite of mine? Well, it's SO easy, looks hard and is delicious!!! I cut many steps out by using my hot peach jam, made with jalapenos. This is a wonderful start to any meal or perfect for a light meal when paired with fruit or veggies. Just another reason why I love Pampered Chef so much!!!
Friday, August 03, 2007
Cookbooks
Why do I love cookbooks? They are SO expensive and honestly, I may never use a recipe out of them but I can't resist!!! Don't get me wrong, I do use them and I think I've used each of them at least once.... I have this thing about recipes - they are meant to be altered or are suggestions. I have found out the hard way that some things, like cakes, are meant to be followed, exactly.
Back to cookbooks, I LOVE them! I have some recent favorites:

Spin on Salads doesn't only have salad recipes but dressings, too! And lots of tips on making salads hearty enough for a meal; which I'll about with temps in the high 90's and 100's!!! Even the kids will go for a great salad when it's hot.
With tips on how to make salad last longer in the fridge to making your vinaigrettes work, I love this one!

Back to cookbooks, I LOVE them! I have some recent favorites:

Spin on Salads doesn't only have salad recipes but dressings, too! And lots of tips on making salads hearty enough for a meal; which I'll about with temps in the high 90's and 100's!!! Even the kids will go for a great salad when it's hot.
With tips on how to make salad last longer in the fridge to making your vinaigrettes work, I love this one!

Main Dishes is another new fave. With recipes ready in 30 minutes or less, potluck options and special occasions, what's not to like? Add in options for meatless meals or easy double recipes it works for me! I love that it reminds me to cook ahead for recipes which helps me with my weekly menu planning and anytime I can "cook once and eat twice" is a hit in my book! I also love neat names like "Farmstand Frittata." Frittata sounds so with it when I tell the kids what we're having for supper. Ha! Unfortunatley, this cookbook is being discontinued and is only available this month (August). I'm sure there will be something neat to come next but I'm so glad I got this one while I could! If you want it, let me know and I'll try and "hook you up!"
I have other books I turn to for inspiration but since the move I have not unpacked the two boxes of cookbooks I love and so it's been my Pampered Chef cookbooks and the internet; which I love. Mostly, I love taking several recipes and then making my own creation. It's the only creative outlet I have, now that I think of it! Interesting discovery I just made.
Well, I best get cookin'! I have a Home Interior party tomorrow and a house blessing on Sunday so I have some neat little desserts to make!
Tuesday, July 11, 2006
Summer is Flying By!
Man, where is time going??? Troy is off to kids camp after completing and passing driver's ed. The girls are still in Spanish Camp two days a week, Reggie is working with Roy and Paco and I are staying crazy busy with the kids, funeral escorts and house/yard work.
We had my soon-to-be niece's wedding shower last night. She decided a few weeks ago she wanted to do a Pampered Chef Shower so that took most of the work out for us. YEAH! Mandy Joy is her name and she's a sweet little doll from Texas, complete with accent. We got to meet her mother and sister and with the 3 of them together, it's a hoot to listen to them talk! Anyway, she had a nice shower. Got some great Pampered Chef items and earned a total of $60 dollars and 2 half-price items off of 10 people! She is starting a home with some wonderful quality products that will hopefully make her life easier. I know it has mine.
Speaking of, I got my order yesterday - all SEVEN boxes!!! It was like Christmas! I hurried and went through everyone else's order so Mandy could open some things up last night that were bought for her. I have some cleaning out cupboards and pantry to do to make room for my new things. I'm so excited!!!
Erik's wedding to Mandy is Friday evening so we have a few parties before the actual event to attend - a Fajita dinner tonight. I'll make my Mother-in-law's rice. Rehersal Thursday evening and the dinner to follow. Paco is the "ring bear" so pray for us! Then Fri is the wedding. We are supposed to have low 90's this week but it sure has felt hotter than that. Since it's outside, I'm praying for cooler than 100 degrees!!
Update on potty training:
Going great! Haven't used pull-ups in 3 weeks now. We just deal with the occasional accident and go on. Thankfully, others are helping me out when they're around and are taking him potty and asking him if he's dry or wet. He'll even go in public restrooms now and I stood him on my feet Sunday and he went standing up so that's great, too! Anyway, for those who care (Heather) here's our update on that big milestone!
We had my soon-to-be niece's wedding shower last night. She decided a few weeks ago she wanted to do a Pampered Chef Shower so that took most of the work out for us. YEAH! Mandy Joy is her name and she's a sweet little doll from Texas, complete with accent. We got to meet her mother and sister and with the 3 of them together, it's a hoot to listen to them talk! Anyway, she had a nice shower. Got some great Pampered Chef items and earned a total of $60 dollars and 2 half-price items off of 10 people! She is starting a home with some wonderful quality products that will hopefully make her life easier. I know it has mine.
Speaking of, I got my order yesterday - all SEVEN boxes!!! It was like Christmas! I hurried and went through everyone else's order so Mandy could open some things up last night that were bought for her. I have some cleaning out cupboards and pantry to do to make room for my new things. I'm so excited!!!
Erik's wedding to Mandy is Friday evening so we have a few parties before the actual event to attend - a Fajita dinner tonight. I'll make my Mother-in-law's rice. Rehersal Thursday evening and the dinner to follow. Paco is the "ring bear" so pray for us! Then Fri is the wedding. We are supposed to have low 90's this week but it sure has felt hotter than that. Since it's outside, I'm praying for cooler than 100 degrees!!
Update on potty training:
Going great! Haven't used pull-ups in 3 weeks now. We just deal with the occasional accident and go on. Thankfully, others are helping me out when they're around and are taking him potty and asking him if he's dry or wet. He'll even go in public restrooms now and I stood him on my feet Sunday and he went standing up so that's great, too! Anyway, for those who care (Heather) here's our update on that big milestone!
Friday, June 16, 2006
Banana Cake
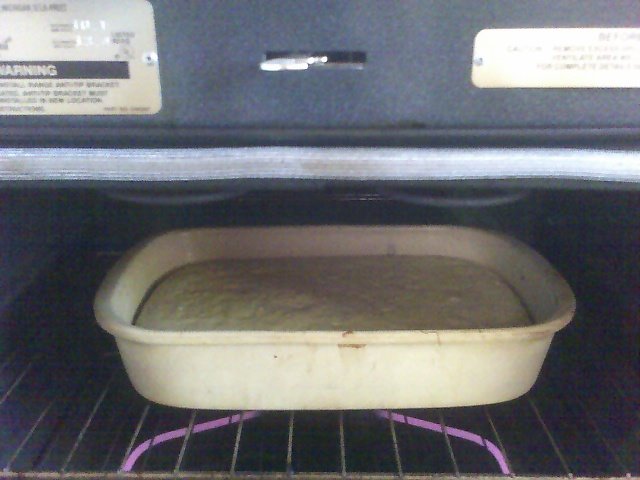
A friend of mine, Brenda, brought this cake to one of our church's "Soup & Salad Suppers" and boy was it a hit with my family. So much so, that I had to ask her for the recipe! Each time we have a get-together or a dessert is needed, my kids - especially Troy, beg me to make this one. Since anything banana is a fave of Roy's I thought I'd make it tonight as we kick-off Father's Day weekend!
We don't normally have all our kids on Friday night so it is a special occasion, indeed. To finish off our T-Bone Steak and Potatoes with Fettuccini Alfredo dinner, we will have this glorious dessert, served warm. Delish!!
Banana Cake
1 1/2 c sugar
1/2 c softened butter
3-4 mashed bananas
1 t. vanilla
3 eggs
2 1/2 c flour
1 1/4 t baking powder
1 t baking soda
1/2 t salt
3/4 c buttermilk
Cream sugar and butter then add the bananas, vanilla & eggs. In different bowl, mix dry ingredients together. Divide in half. Add half the dry flour mixture to the batter, add buttermilk, add remaining half of four mixture. Pour into a 9x13 pan.
Bake at 350 for 30-40 min, until toothpick inserted comes out clean.
To make buttermilk:
for each 1/2 c milk, add 1 T of vinegar. For 3/4 C buttermilk, use 3/4 c regular milk, add 1 1/2 T to the milk, stir and walah! Substitute Buttermilk! Good for any recipe when baking!
Frost cake as desired, cream cheese frosting is always a hit, as is chocolate!
Subscribe to:
Posts (Atom)